Workspaces
Workspaces keep domains, projects and search groups organised. Create separate workspaces for different clients, regions or business units.
Quick start
1. Navigate to Settings > Workspaces
2. Click New Workspace
3. Enter a name and click Create
4. Use the workspace switcher in the header to change context
Understanding the display
The Workspaces page shows a table with all workspaces in the account. Each row displays the workspace name and linked resource counts.
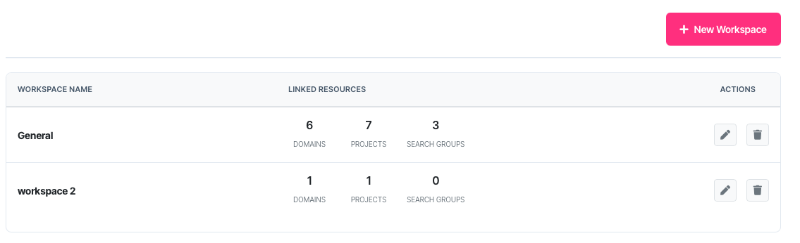
Linked resources
Each workspace tracks three resource types:
| Resource | Description |
| Domains | Websites being tracked in this workspace |
| Projects | Task boards and project management items |
| Search Groups | Keyword tracking configurations |
Available actions
| Action | Description |
| Rename | Change the workspace name (pencil icon) |
| Delete | Remove an empty workspace (bin icon) |
What should I do next?
The right action depends on the current situation:
| Situation | Action |
| Starting fresh | Create workspaces for each client or business unit before adding domains |
| Single client | The default workspace is sufficient. Rename it if needed. |
| Multiple clients | Create one workspace per client for clean separation |
| Regional teams | Create workspaces by region (UK, US, APAC) for localised reporting |
| Workspace cluttered | Move resources to new workspaces, then delete empty ones |
Using the workspace switcher
The workspace switcher appears in the header when multiple workspaces exist. It controls which workspace data appears throughout SERP360.
How it works
• Select a workspace from the dropdown
• The page reloads with data filtered to that workspace
• The selection persists across sessions until changed
Note: The switcher only appears when two or more workspaces exist.
Creating a workspace
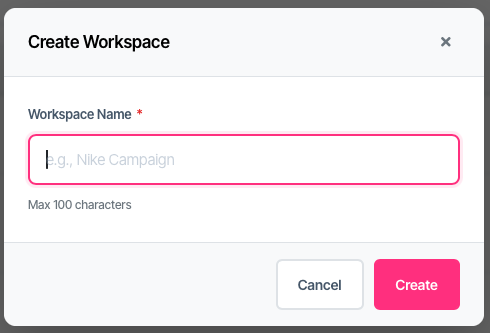
5. Click New Workspace
6. Enter a name (maximum 100 characters)
7. Click Create
Choose descriptive names that identify the client, region or purpose clearly.
Renaming a workspace
8. Find the workspace in the table
9. Click the pencil icon
10. Edit the name
11. Click Save
Renaming a workspace does not affect linked resources. All domains, projects and search groups remain connected.
Deleting a workspace
Workspaces can only be deleted when empty and when at least one other workspace exists.
Requirements
• Zero linked domains
• Zero linked projects
• Zero linked search groups
• At least one other workspace in the account
Steps
12. Move or delete all linked resources first
13. Click the bin icon next to the workspace
14. Click Delete to confirm
Warning: Deletion is permanent and cannot be undone.
API access
Each workspace has a unique API ID for use with the SERP360 API. Find workspace IDs on the API Management page under "Your Workspaces".
Include the workspace_id parameter in API requests to scope data to a specific workspace.
Troubleshooting
Cannot delete workspace
The workspace has linked resources. Check the Domains, Projects or Search Groups columns. Move or delete these resources before attempting deletion.
Delete button missing
Only one workspace exists in the account. Create a second workspace before deleting the first. Every account requires at least one workspace.
Cannot create or rename workspace
Only account owners can manage workspaces. Sub-accounts have view-only access. Contact the account owner to make changes.
Workspace switcher not showing
The switcher only appears when multiple workspaces exist. Create a second workspace to enable the switcher.
Data not updating after switch
The page reloads automatically when switching workspaces. If data appears stale, refresh the browser. Clear the browser cache if the issue persists.
FAQ
How many workspaces can I create?
There is no fixed limit. Create as many workspaces as needed for effective organisation.
Can sub-accounts create workspaces?
No. Only the account owner can create, rename or delete workspaces. Sub-accounts can view and use workspaces they have permission to access.
What happens to data when I delete a workspace?
Workspaces must be empty before deletion. Move all domains, projects and search groups to another workspace first. No data is lost during workspace deletion because deletion requires the workspace to be empty.
Does renaming affect linked resources?
No. Renaming a workspace changes only the display name. All linked domains, projects and search groups remain connected and unaffected.
Getting help
Contact support for account ownership or permission issues