Manage Session Tracking
Set up visitor tracking across your websites
Track how visitors interact with your pages. Capture their journey, spot conversion blockers, and fix usability issues before they cost you sales.
This guide shows you how to configure tracking and manage your monitored pages.
Getting started
Add your first domain
Choose which website you want to track. Click Select Domain and pick from your available properties.
Don't see your domain? Click Add Domain to enable tracking for a new site.

Choose your tracking mode
Pick how you want to track visitors. You'll see two options after selecting a domain.
Cookieless tracking runs session-only monitoring. Each visit creates a separate session that ends when visitors close their browser. This approach respects privacy by design and requires no consent banners.
Cookie-based tracking follows visitors across multiple sessions for up to one year. You'll see returning visitors and track behaviour over time. This mode requires cookie consent under GDPR.
Click the card that matches your needs. Your selection saves automatically.
Control your tracking

Turn tracking on or off
Toggle the Tracking Enabled switch to pause or resume monitoring. When disabled, your tracking pixel stops collecting data but your existing sessions remain viewable.
Use this when testing changes or during site maintenance.
Remove all tracked pages
The Delete All Pages button removes every monitored URL for the current domain. This action permanently deletes all tracking data and removes the domain from your active tracking list.
You'll need to re-add the domain and configure pages again if you want to resume tracking later.
Add pages to track

Enter a URL
Type the page address you want to monitor in the Add URL to Track field. Enter the full path like /products/item-123 or the complete URL including https:// .
The system normalises your URL automatically. It removes the protocol, trims trailing slashes, and stores a clean version for matching.
Click Add URL to start capturing.
What happens when you add a URL
The system captures your page in two ways: HTML content and screenshots across three devices (desktop, mobile, tablet).
HTML capture happens immediately. The system fetches your page source and stores it for session replay. This takes about 5-10 seconds.
Screenshot capture queues in the background. You'll get three images showing how your page renders on different screen sizes. Processing completes within 5-10 minutes.
HTML displays by default for session replay. Switch to screenshots if your HTML rendering looks incorrect.
Suggested pages to track
The system analyses your visitor journeys and suggests pages you should track.
How suggestions work
The system looks at sessions from your conversion paths over the past 14 days. It finds pages that visitors viewed during these journeys but aren't tracked yet.
If you haven't set up conversion paths, the system falls back to sessions that touched any of your currently tracked pages.
Suggestions appear ranked by session count. Pages that more visitors interact with appear first.
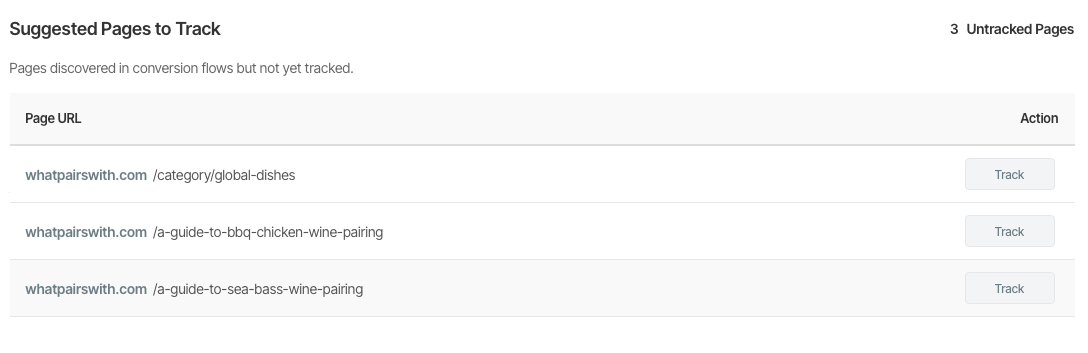
View suggested pages
The Suggested Pages to Track section appears automatically after you select a domain. You'll see it between the Add URL section and your tracked pages table.
The stats badge shows how many untracked pages the system discovered. This count updates automatically as you add pages.
If you don't see any suggestions, you need to create conversion paths first. The system needs active conversion flows to analyse visitor journeys.
Add a suggested page
Click the Track button next to any suggested page. The system adds it to your tracked pages immediately and starts capturing HTML and screenshots.
The page disappears from suggestions after you add it. Your tracked pages table updates automatically.
The suggested pages count decreases as you add pages. When you've added all suggestions, the entire section hides until the system discovers new pages.
When suggestions update
The system analyses your conversion flows whenever you select a domain. Suggestions reflect the most recent 14 days of visitor activity.
Add new conversion paths or update existing ones to see different suggestions. The system detects pages based on which paths visitors follow.
Manage your tracked pages

Search and filter pages
Use the search box to find specific URLs. Type any part of the page address to filter your list instantly.
Change Show to display more or fewer pages per screen. Pick from 10, 25, 50, or 100 results.
Understand the action buttons
Each tracked page shows four buttons in the actions column.
HTML button switches session replay to use your captured HTML. The green highlight shows it's active. Click to toggle this view mode.
Screenshot button switches to screenshot-based replay. The green highlight confirms it's active. Click to toggle this view mode.
Refresh button updates both HTML and screenshots with fresh captures. Use this after changing your page content. HTML stays as the default display method.
Delete button removes the URL from tracking. This action deletes all associated data including HTML, screenshots, and session recordings.
Toggle between HTML and screenshots
Click HTML or Screenshot to change how visitors see your page during session replay. The active method shows with a green background.
Choose HTML when your page structure is clean and renders correctly. HTML loads faster and shows interactive elements accurately.
Choose Screenshot when your page uses complex JavaScript, dynamic content, or heavy animations. Screenshots capture the exact visual appearance but don't show interactions.
Refresh your page captures
Page content changes regularly. Click Refresh on any URL to recapture both HTML and screenshots.
The system fetches fresh HTML immediately and queues new screenshots for background processing. Your previous captures delete automatically when new ones complete.
HTML remains the default display method after refreshing. Switch to screenshots manually if needed.
Understanding the capture process
HTML capture explained
HTML capture fetches your page source code and stores it in the database. Session replay reconstructs your page from this HTML when visitors watch recordings.
The system strips sensitive fields like passwords and credit card inputs automatically. Your visitors' private data never appears in replays.
Screenshot capture explained
Screenshot capture renders your page on three device sizes and saves images. Each capture creates desktop (1200px), mobile (375px), and tablet (768px) versions.
Screenshots queue for background processing. Processing takes 5-10 minutes per page depending on page complexity and server load.
Tracking modes in detail
Cookieless tracking
Each browser tab creates a separate session. Visitors who close their browser and return later start a fresh session.
What you track:
- Complete session journey from entry to exit
- All page interactions during the visit
- Device type and browser information
- Traffic source and referrer
What you don't track:
- Returning visitors across sessions
- Long-term behaviour patterns
- User retention metrics
Best for: Privacy-focused sites, GDPR compliance, basic conversion tracking
Cookie-based tracking
Persistent cookies track visitors across multiple sessions for up to one year. You'll see when visitors return and how their behaviour changes over time.
What you track:
- First-time vs returning visitors
- Total visit count per user
- Behaviour changes across sessions
- Long-term conversion journeys
What you don't track:
- Anything after cookie expiry (365 days)
- Visitors who decline cookies
- Users in private browsing mode
Best for: Retention analysis, multi-visit funnels, behaviour cohorts
Important: Cookie-based tracking requires user consent. Implement a cookie consent banner before enabling this mode.
Working efficiently
Check capture status
Green buttons show the active display method active for session replay.
When to refresh captures
Refresh after making content changes to your page. This ensures session replays show your current page structure, not outdated versions.
Troubleshooting
Domain doesn't appear in dropdown
Check these items:
- The domain exists in your account
- You have permission to access it
- The domain has been added to tracking (check available domains list)
If the domain exists but isn't tracking-enabled, click Add Domain to activate it.
HTML capture fails
HTML captures fail when pages timeout, block scraping, or require authentication.
Try these fixes:
- Check the URL loads in your browser
- Verify the page doesn't require login
- Ensure your site allows scraping (check robots.txt)
- Wait and retry—temporary server issues resolve themselves
Screenshots fail repeatedly
Screenshots fail when pages timeout, have complex animations, or load too slowly.
Try these fixes:
- Simplify page animations
- Reduce page weight and load time
- Check for JavaScript errors in browser console
- Contact support if one specific page consistently fails
Page shows in table but buttons are grey
The page exists in tracking but captures haven't completed yet.
Check capture status:
- HTML captures complete within 10 seconds
- Screenshots queue for background processing (5-10 minutes)
- Failed captures retry automatically up to 3 times
Wait 10 minutes then refresh the page list. Contact support if buttons stay grey after 30 minutes.
Can't delete a page
You need permission to access the domain that owns the page.
Verify your access:
- Check you're viewing the correct domain in the dropdown
- Confirm you have edit permissions for this domain
- Switch domains if you selected the wrong one
Tracking disabled but can't re-enable
The Tracking Enabled toggle requires domain permissions.
Check these requirements:
- You own or have admin access to the domain
- The domain hasn't been deleted from your account
Contact your account owner if you lack the required permissions.
No suggested pages appear
The Suggested Pages section needs active conversion paths to work.
Check these conditions:
• You have at least one active conversion path configured
• Visitors have triggered path steps in the past 14 days
• The suggested pages aren't already in your tracked pages
If you haven't set up conversion paths yet, create them first. The system needs conversion flows to analyse visitor journeys
Suggested pages seem irrelevant
The system suggests pages based on actual visitor behaviour in your conversion paths.
Review these factors:
• Check which conversion paths are active
• Verify path steps match your intended conversion flow
• Consider whether suggested pages are part of legitimate user journeys
Irrelevant suggestions often indicate unexpected visitor behaviour. This reveals real paths visitors take versus paths you expected.
Best practices
Start with key pages
Add your most important pages first: homepage, main product pages, checkout flow, and pricing page.
Monitor these for a week before expanding. You'll learn the tool faster with focused tracking.
Use consistent URL formats
Pick one URL format and stick with it. Either use full URLs with https:// or just the path like /products/example .
Refresh after changes
Schedule a refresh whenever you update a page. Set reminders after deployments to keep captures current.
Stale captures confuse you when analysing sessions. You'll wonder why visitors interact with elements that don't match your current page.
Document your tracking strategy
Note which pages you track and why. Document your mode choice (cookieless vs cookie) with reasoning. This helps team members understand your setup when they access the account later.
Need help?
Can't find what you need? Contact our support team at help@serp360.ai